Your own parts and weapons
The catalog is built from the image files of every content pack in the project. When a pack is added or removed, or images are added to or removed from one, the catalog rebuilds itself the next time the editor is in focus; this takes under a minute. To rebuild by hand, for example after redrawing an image at the same size, run Tools > Pixel Legion Maker > Build Catalog.
Put your own art in a pack of your own outside Assets/PixelUnitStudio, so package updates never touch it.
Parts
Parts go in Parts/<Slot>/<name>.png.
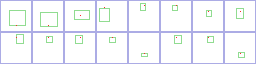
- A part image is a 256×64 slot sheet that uses the same cell layout as the rig. See
Rig/part_guide.pngandRig/body_template.png. Only fill the cells your slot draws (for example the Head cell for Hair, Mask and Ornament). - An optional
<name>_full.png(the part drawn on the 29×42 full body,Rig/base_body_full.png) is used as the card icon. - Outline color is (16, 5, 5). Draw the character facing left.
- Import settings: Sprite, point filter, no compression.
Weapons
Weapons go in Weapons/<kind>_<name>.png.
- One square image (48, 64, 80 or 96 pixels). The image center is the grip. The blade points left. See
Rig/weapon_guide.png. - The first word of the file name picks the motion style:
sword,axe,mace(default swing),spear,staff,bow,crossbow,gun,dagger,throw, and heavy weaponsgreatsword,greataxe,hammer,club,halberd,scythe. Names starting withshieldare shields. - Keep one-handed weapons about 16–26 pixels from grip to tip so they stay above the ground in every motion.

Projectiles
Projectiles go in Projectiles/<style>_<name>.png (16×16, pointing left). The first word is the weapon style that shoots it: bow, crossbow, gun or staff.
Dyeing
Dyeing recolors the most common color group of a part with one of the dye palettes, keeping its light and shade steps.